

Description
SafeEndo BIOACTIVE 3D is an advanced bioactive dental material designed to support natural tooth repair and long-term restoration stability. It promotes effective sealing and interaction with tooth structure during restorative and endodontic procedures. Suitable for professional dental use, it helps enhance clinical outcomes with reliable handling and performance. A premium SafeEndo bioactive solution for modern dental clinic practice.
FEATURES
• BioActive 3D can be used, in addition to conventional techniques, in singlecone
technique and thermoplastic filling.
• Use conventional gutta removal techniques.
Single-cone technique
1. Anesthetize, install absolute isolation and then perform the
biomechanical preparation of the canal.
2. Remove the sealing tip and attach the applicator tip to the syringe.
3. Dry the canal only with absorbent paper cones without causing
excessive dryness.
4. Apply BioActive 3D in the apical third of the canal directly with the syringe.
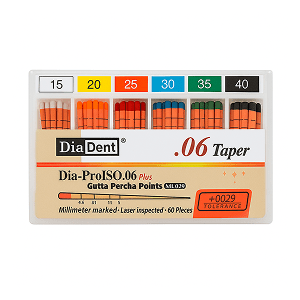
5. Insert the gutta percha cone.
6. X-ray for checking the correct filling of the canal.
7. Cut the cone at the desired height with heated instruments followed by vertical
compression.
8. Remove excessive material from the canal walls with suitable irrigating
solutions for this purpose, perform crown sealing and restoration.
KEY SPECIFICATION
BioActive 3D is a bioactive root canal sealer based on innovative mineralmicroaggregatechemistry “ActiveBiosilicateTechnology”thatoffers
1) Biocompatibility: high mineral purity and monomer free formulation reducing
the risk of adverse tissue reaction
2) Bioactive properties: hydroxyapatite formation at the tooth-sealer interface and
mineralization of dentinal structure
3) Alkaline pH
4) Sealing properties: crystallization of the material inside the dentin tubules
creating a tight seal
5) Retreatable: if a retreatment is needed, BioActive 3D can be easily removed
from the root canal
6) Strontium silicate base bio-ceramic technology of
DIRECTIONS TO USE
1. Canal preparation: Complete shaping and irrigation as normal. Final irrigant: sodium hypochlorite followed by EDTA, then a saline flush.
2. Dry the canal: Use paper points to remove excess moisture. The canal should be dry but not desiccated – the sealer is hydrophilic but flooding hampers placement.
3. Sealer delivery: Attach the supplied tip to the syringe and inject the sealer into the apical third using slow, gentle pressure. Coat the master cone tip with a thin layer.
4. Cone placement: Seat the master cone to working length. The sealer will flow into lateral canals and accessory spaces as the cone is advanced.
5. Downpack and seal: Use heat to sear the coronal aspect. Ensure adequate coronal seal immediately to prevent contamination during the sealer’s working time.
6. Post-operative review: Periapical X-ray to confirm fill. The sealer appears radiopaque on radiographs for verification.
Packaging
1 x 3gm syringe
Reviews
There are no reviews yet.